
Some recipes feel like a warm hug from a friend. I still remember the first time I watched a round chocolate sphere bloom open in a mug. Steam lifted, marshmallows floated, and the room smelled comforting in a way that made me sigh.
These fun, giftable spheres are hollow shells filled with cocoa mix and mini marshmallows. When you pour hot milk over them, they melt and release a creamy, chocolatey surprise that turns a simple cup into an event.
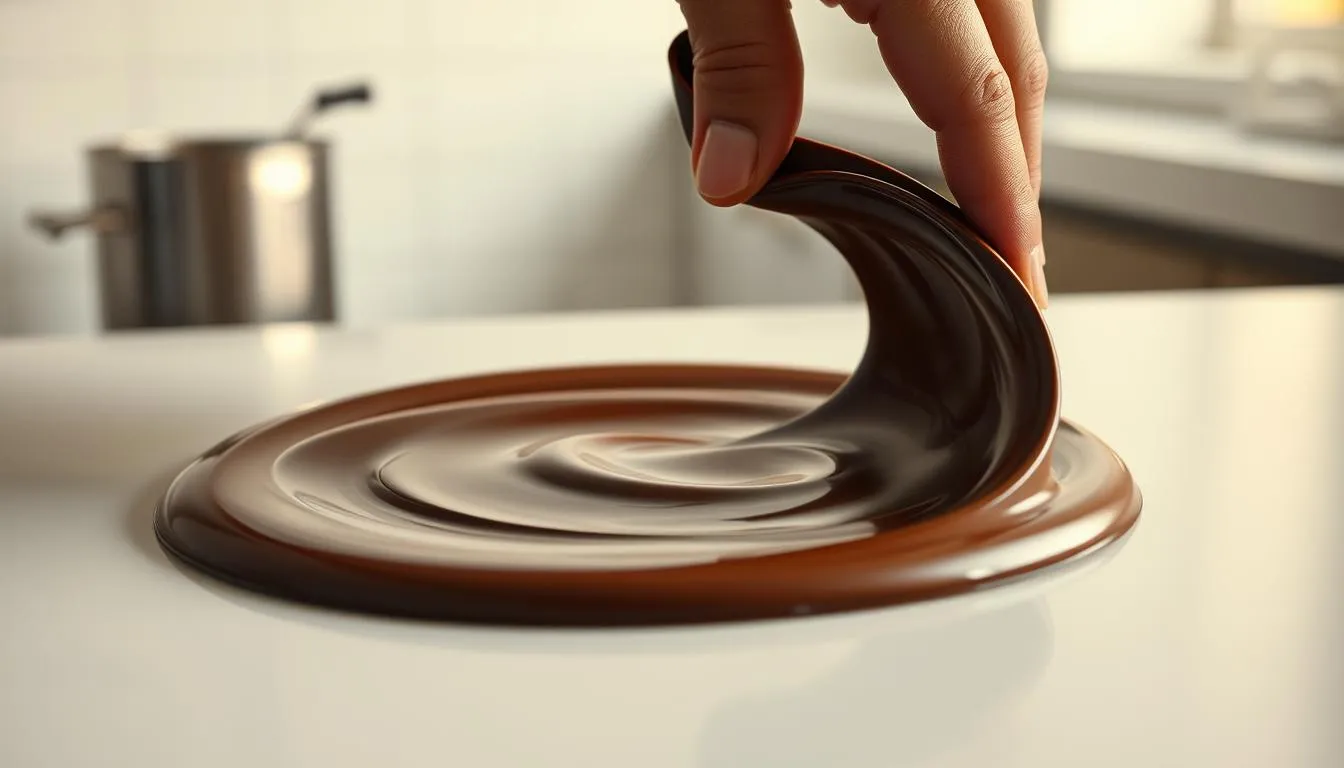
Using quality chocolate — think Lindt or couverture — makes a big difference. A silicone sphere mold helps beginners, and a small thermometer keeps shells glossy and snappy.
We’ll cover the basic ingredients, a simple homemade cocoa blend, and how to make one cup just right. If you want more, see a trusted guide for extra tips at this recipe.
Key Takeaways
- These spheres release cocoa mix and marshmallows when you pour hot milk.
- Use tempered, high-quality chocolate for shine and snap.
- Silicone molds are beginner-friendly; polycarbonate gives sharp edges.
- A simple cocoa mix of sugar, cocoa, and salt stores well at room temperature.
- Plan for about 14 oz of hot milk per sphere for a balanced cup.
What Are Hot Chocolate Bombs and Why They’re So Fun
These little edible orbs open when warmed, releasing a swirl of cocoa and soft marshmallows into a mug.
In simple terms: a hollow chocolate shell filled with hot cocoa mix and mini marshmallows. Pour warm milk over the sphere in a mug, and the shell melts to reveal the mix. Stir and sip for a creamy, playful drink.
The visual “bloom” as the shell opens makes making hot chocolate a small show. Kids and adults love watching marshmallows rise and cocoa swirl. It turns a plain cup into a memorable moment for gifts or gatherings.
You can balance texture and taste by choosing a rich chocolate shell and a smooth cocoa blend. Want a creamy twist? Try white chocolate for a milder, sweet finish.
Quick tips: use decent-quality chocolate to avoid waxy melt, pick simple molds for easy release, and adjust milk to control sweetness and strength. First-timers will find a basic setup delivers a big payoff.
- Great for gifting with a small tag of directions.
- Seasonal or everyday treat—customize with sprinkles or drizzle.
- Molds affect look and ease, but the reveal is always the highlight.
| Variant | Taste | Best use |
|---|---|---|
| Dark shell | Deep, rich chocolate flavor | Gifts, adult-friendly cups |
| Milk shell | Sweet and smooth | Everyday cozy drinks |
| White chocolate | Creamy, sweet twist | Party themes, flavored cocoa |
Want a simple project for kids? Check this kids’ DIY guide for a friendly tutorial.
Ingredients and Tools You’ll Need to Make Hot Chocolate Bombs
A neat setup of quality ingredients and simple gear sets you up for success.
Core ingredients to have on hand: quality chocolate, a favorite hot cocoa mix or a quick homemade chocolate mix, milk for serving, and mini marshmallows for that classic pop.
For a DIY cocoa blend, mix 2/3 cup sugar, 1/3 cup cocoa powder, and a pinch of salt. This lets you dial sweetness and cocoa intensity to taste.

Choosing chocolate
Start with good bar chocolate or couverture for the best melt and flavor. Brands like Lindt semi-sweet or Callebaut couverture give shine and snap.
Reserve chocolate chips as add-ins; many are made to hold shape and can temper poorly. Candy melts work for ease but trade off real chocolate flavor.
Essential tools
Use silicone molds if you want flexibility and easy release. Acrylic or polycarbonate molds give a glossy finish but need a bench scraper and quicker chilling.
- Thermometer (instant-read or infrared) — make sure chocolate reaches proper temper for shine and snap.
- Piping bag and parchment paper to seal and keep your station tidy.
- 1/4” paintbrush for painting thin, even coats in silicone molds.
- Bench scraper for leveling and controlling shell thickness with acrylic molds.
| Item | Purpose | Tip |
|---|---|---|
| Quality bar chocolate | Main shell | Use couverture for best flavor and melt |
| Silicone molds | Easy shaping | Flexible release; paint thin layers for strength |
| Polycarbonate molds | Shiny finish | Scrape edges and chill briefly for clean rims |
| Thermometer | Temperature control | Ensures tempered chocolate for glossy shells |
Make sure you organize ingredients and tools before you begin so the process flows while chocolate is at the right stage. Pick a mold style that matches your comfort and batch goals to enjoy the project from start to finish.
Choosing the Best Chocolate: Semi-Sweet, Milk, or White Chocolate
Your choice of chocolate defines shine, snap, and how well a shell holds its shape.
Real chocolate contains cocoa butter, which gives a superior melt and glossy finish. Couverture (for example, Callebaut) flows beautifully into molds and sets with a professional look. Use it when flavor and texture matter most.
Compound coatings like candy melts are convenient and forgiving. They melt-and-go and work well with silicone molds, but they taste flatter and can feel waxy compared to true chocolate.
Temper with care: semi-sweet should stay near 90°F, milk below about 86°F, and white chocolate under 84°F. Keep white chocolate at stable room temperature while working to avoid graininess.
“Make sure to test one sample for shine and snap before you fill a full batch.”
| Type | Best for | Tip |
|---|---|---|
| Semi-sweet | Deep cocoa flavor | Use for intense hot cocoa and adult-friendly cups |
| Milk | Sweet, creamy cups | Gentle tempering keeps a smooth shell |
| White chocolate | Coloring and vanilla-forward treats | Keep cool; handle at room temperature to avoid bloom |
- Choose reliable brands like Lindt or Callebaut to reduce frustration.
- Pick your method—microwave or double boiler—and respect temperature ceilings.
- Decide between artisanal flavor or quick convenience when making bombs for gifts.
Tempering and Melting Methods for Silky, Snappy Chocolate
Mastering melt control is the key step between a messy batch and professional-looking spheres.
Microwave tempering (step-by-step)
- Chop chocolate finely so it heats evenly.
- Heat 30 seconds, then stir. Use 15-second bursts after that.
- Keep semi-sweet ≤90°F, milk ≤86°F, white ≤84°F. Stop when pieces are nearly melted and stir to finish.
Double boiler method
Simmer water over low heat. Set a heat-safe bowl above the water without touching it. Stir gently until smooth to avoid scorching or steam contact with food.
How to test temper
Make a thin smear on parchment and chill 5 minutes. If it is glossy and snaps cleanly, you are good to go.
“If overheated, seed with finely chopped chocolate and stir patiently to restore temper.”
Make sure you monitor with a thermometer the whole time. Remove chocolate from heat just before fully melted so residual warmth finishes the job. Timing matters: have molds polished and ready so you can place chocolate into them the moment it is tempered.
| Method | Best use | Key tip |
|---|---|---|
| Microwave | Small batches, fast prep | Short bursts + stirring to avoid hot spots |
| Double boiler | Large batches, gentle control | Keep bowl off water and stir slowly |
| Rescue by seeding | Overheated chocolate | Add chopped chocolate and stir until glossy |
Final reminders: Proper tempering helps shells release cleanly, reduces breakage, and saves time when assembling hot chocolate bombs. Be patient—short, controlled heating keeps your results consistent and professional.
Hot chocolate bombs
Size and filling choices decide how a single sphere performs in your favorite mug.
Ideal size, mug fit, and cocoa-to-milk ratio
Common sizes: many silicone half-sphere molds measure 2.75” (67 mm) while polycarbonate and acrylic setups are often 2.5” (63 mm).
A 2.5” sphere fits most average mugs and holds roughly 1 tablespoon of hot chocolate mix. A 2.75” sphere gives more room and can take up to 2 tablespoons.
For a balanced cup, aim for about 14–16 ounces of hot milk per sphere. That range produces a rich, not overly sweet, hot cocoa experience.
How much mix and marshmallows to add per chocolate bomb
Plan on 1–2 tablespoons of chocolate mix or cocoa mix per shell plus about 1 tablespoon of mini marshmallows for texture.
Split fillings between the two halves for even distribution and easier sealing along the half seam. Larger spheres can hold specialty add-ins like flavored sugar or a small cookie, but keep totals proportional so milk still mixes smoothly.
- Test one chocolate bomb with your preferred mug and milk amount before batch-making.
- Semi-sweet shells will highlight the cocoa; milk shells add sweetness—pick based on taste.
- Note your exact mix and milk volumes so you can repeat the ideal cup every time.
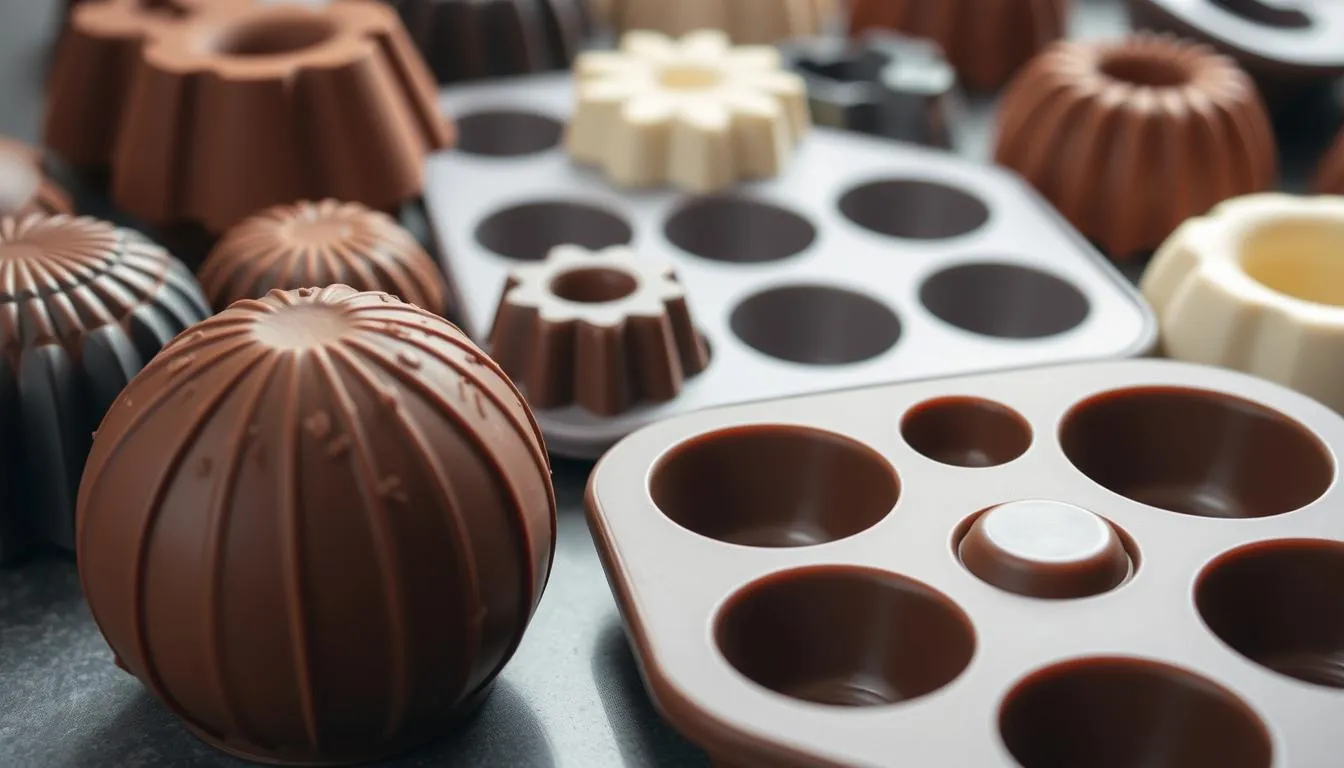
Understanding Molds: Silicone, 3-Part, and Polycarbonate
The mold you choose controls finish, speed, and how easy it is to release each sphere.
Silicone molds are budget-friendly and forgiving. Many half sphere cavities are about 2.75” (67 mm). They flex for easy release and you can cut sheets into single cavities for better handling. Use two thin coats of coating when you make bombs with real chocolate, or use candy melts directly for a quicker result.
3-part molds
Three-part PET molds (often 70 mm/2.75”) use thin inserts to build uniform wall thickness. They speed up production and give consistent spheres, which helps when you make bombs in batches.
Handle them gently: PET inserts cannot be heated or dishwashed. There’s a short learning curve, but the payoff is steady output and less waste.
Polycarbonate molds
Polycarbonate dome molds (around 2.5”/63 mm) are rigid and durable. When you use properly tempered chocolate, these molds produce sharp edges and a glossy finish that looks professional.
They cost more but last longer. Clean by polishing and scraping; avoid harsh dishwashing to preserve shine.
| Type | Strength | Best for |
|---|---|---|
| Silicone | Flexible, cheap, easy release | Beginners, small batches, candy melts |
| 3‑part PET | Uniform walls, fast output | Production runs, consistent spheres |
| Polycarbonate | Sharp edges, glossy finish | Professional look, tempered chocolate |
Pick molds based on cost, speed, and desired finish. Start with silicone to learn technique, then step up to 3‑part or polycarbonate when you want faster runs or a cleaner, more polished result.
Step-by-Step: Making Chocolate Spheres with Silicone Molds
A clean mold makes a big difference. Polish each cavity with a soft paper towel to remove dust and oils. This small step helps shells set glossy and release easily.
Polishing and painting thin coats
Make sure your chocolate is properly tempered before you place chocolate into each cavity. Paint a thin, even coat that reaches the rim.
Chill the mold about 5 minutes to set the first layer. Apply a second coat, focusing on building a stronger rim for sealing.
Building strong rims and clean releases
If you prefer, spoon melted chocolate and push it up the sides, then freeze roughly 10 minutes before you remove chocolate halves. Watch the time in the fridge to avoid condensation later.
- Flex silicone just enough to release each half without cracking.
- Touch up thin spots with a dab of tempered chocolate along the half edge.
- Load leftover chocolate into a piping bag for sealing and quick drizzles.
Work in small batches if your kitchen is warm. Set finished halves on parchment so bottoms stay smooth as you fill and join the bombs.
Step-by-Step: Using Acrylic and 3-Part/Polycarbonate Molds
A lightly warmed acrylic cavity helps chocolate flow smoothly and reduces premature setting. Before you pour, polish each mold cavity with a soft cloth to remove dust and fingerprints.
Warm the mold gently with a hair dryer or heat gun on low to take the chill off acrylic. Do not heat PET inserts — wipe them clean instead.
Warming, pouring, tapping, and scraping
Place tempered chocolate at roughly 90°F for semi-sweet. Pour quickly and place chocolate to coat the walls, then tap the mold to release air bubbles for a glossy finish.
Turn the mold over and dump excess back into your bowl. Use a bench scraper to level rims and avoid overly thick shells.
Flipping, setting on parchment, and clean edges
Flip the mold onto parchment so excess pools at the edges. Let it rest about 5 minutes so rims strengthen but do not fully set.
Scrape again to sharpen edges. Clean, even rims help halves meet cleanly when you assemble the spheres later.
Freezing briefly and releasing chocolate spheres
Place the mold in the freezer for about 5 minutes. Properly tempered chocolate will contract and pull away from the walls.
Demold with a firm flip onto parchment. If a shell sticks, coax the corner gently; if multiple stick, check your temper or warm the mold slightly next time.
- For 3-part molds, seat inserts correctly to control wall thickness and speed production.
- Keep parchment under the work to collect scraps and reuse tempered chocolate.
- Watch time in the freezer — over-chilling causes condensation and weakens the finish.
Assembling, Sealing, and Using Your Chocolate Bombs
A tidy seam and measured filling make the difference between a messy snack and a perfect mug.
Filling each half: Set shell halves on a steady surface. Add about 1–2 tablespoons of hot chocolate mix to each half. Add roughly 1 tablespoon of mini marshmallows on top. Keeping fillings dry and fine-textured helps the seam close cleanly.
Sealing options: Pipe a thin bead of melted chocolate around the rim and press the halves together. Or melt a shallow plate, touch the edge of an empty half to the warm plate to soften the rim, then cap the filled half and hold until set.
Serving and variation tips
Place the sphere on the bottom of a mug. Pour 14–16 oz of steaming milk over it (steam, not boiling). Stir thoroughly so the chocolate mix dissolves and any shell bits melt smoothly.
For richer cups, use less milk; for lighter cups, add more. Label gift tags with serving instructions: “Place bomb in mug, pour 14–16 oz hot milk, stir, sip.”
- Work on parchment so bottoms stay smooth and don’t stick.
- Roll the seam in sprinkles for a festive finish or smooth it with a gloved finger for a clean look.
- Handle gently; a strong rim and neat seam help cocoa bombs survive storage and shipping.
| Step | Action | Amount | Tip |
|---|---|---|---|
| Fill | Hot chocolate mix + mini marshmallows | 1–2 Tbsp mix, 1 Tbsp marshmallows | Keep dry, fine-textured ingredients |
| Seal | Pipe melted chocolate or warm plate | Thin bead or quick melt | Press and hold briefly; set on parchment |
| Serve | Place in mug and pour milk | 14–16 oz steaming milk | Stir well; adjust milk for richness |
Decorating, Variations, and Seasonal Twists
Small details like drizzles and sprinkles add big personality to your finished shells.
Drizzles and accents: Use leftover tempered chocolate to drizzle across each shell. Sprinkle with colored sugar, edible glitter, or small candy pieces before the drizzle sets so they adhere.
Pipe shapes like antlers or snowflakes by piping melted chocolate onto parchment. Let them set, then attach with a tiny dab of melted chocolate so they sit flush on the seam.
White chocolate, flavors, and coloring
Explore white chocolate bombs for a creamy, vanilla-forward cup. Use high-quality bars (for example, Lindt) or white couverture; they temper more reliably and taste better than compound coatings.
Color white chocolate using oil-based candy colors or melted colored cocoa butter around 88°F. Avoid water-based dyes — they seize the cocoa butter and ruin texture.
Seasonal twists and flavor swaps
For peppermint, fold crushed peppermint candy into hot cocoa mix or sprinkle candy dust inside the shell. Try flavored hot cocoa mix like mocha or salted caramel to match holidays.
- Dress shells with drizzle, sprinkles, or themed candy for holiday-ready gifts.
- Keep decorative layers thin so the shell still melts easily when making hot servings.
- If you use candy melts for color, reserve them for exterior décor and rely on real chocolate for the shell to preserve taste.
- Offer sampler sets with varied chocolate mix flavors so recipients can pick their favorite cup.
| Decoration | Best for | Material | Tip |
|---|---|---|---|
| Drizzle + sprinkles | Any season | Tempered chocolate + sprinkles | Apply while drizzle is tacky so sprinkles stick |
| Piped shapes (antlers) | Winter/holiday | Tempered chocolate on parchment | Attach with a small dot of melted chocolate |
| Colored shell finishes | Party themes | Oil-based color or cocoa butter | Keep temp ~88°F; avoid water-based dyes |
Storage, Gifting, and Shipping Tips
Treat finished spheres like delicate confections: store, wrap, and pack them to keep flavor and finish intact.
Room temperature storage: Keep bombs at cool, dry room temperature. Wrap each sphere in foil and place them in an airtight container or bag to protect shine and keep moisture out.
Make sure to avoid the refrigerator or freezer when possible. Condensation can cloud the surface and weaken seams. If chilling is unavoidable, let items warm back to room in stages and add a small food-safe desiccant or a baking-soda-dusted paper towel under liners.
Packaging for gifts
Nest spheres in paper cups or clear treat bags. Add a label with flavor, allergen notes, and simple instructions: “place in mug, pour hot milk, stir.” A neat tag saves questions and time for the recipient.
Shipping considerations
Use sturdy boxes, lots of cushioning, and thicker shells or reinforced rims when possible. Expect transit to be rough; survival rates vary. For distant orders, consider hot chocolate pops as a sturdier alternative to mailing fragile spheres.
| Action | Why it helps | Tip |
|---|---|---|
| Foil + airtight container | Protects from light and moisture | Store at cool, dry room temperature |
| Gradual acclimation | Prevents condensation | Bring chilled items to room slowly |
| Sturdy packing | Reduces breakage in transit | Use bubble wrap and firm inserts |
Pro Tips and Troubleshooting Common Issues
A few quick checks often solve the most common temper and release problems.
If shells look dull or bend instead of snapping, your temper slipped. Seed the batch with finely chopped chocolate and re-test on parchment. This normally restores shine and snap in a bit.
Make sure the mold is spotless; any residue or moisture leaves marks or causes sticking. Use a soft cloth and avoid soaps that leave film.
Support silicone molds on a rigid sheet pan so they don’t flex while you build rims. For acrylic or polycarbonate, a short 5-minute freeze often helps remove chocolate that clings due to under-setting.
- Wear thin gloves to prevent fingerprints and handle chocolate spheres at the rim.
- If seams pop, warm the edge or pipe a fuller bead of chocolate and hold until set.
- Keep extra tempered chocolate on hand to patch thin spots immediately.
- When making hot chocolate for testing, tweak milk by a couple of ounces to dial sweetness and strength.
| Problem | Likely cause | Quick fix |
|---|---|---|
| Dull, streaky shells | Tempering slipped | Reseed with chopped chocolate; re-test |
| Shells stick in mold | Under-set or wrong temper | Freeze 5 minutes; check temp next batch |
| Cracked seam | Thin rim or rough join | Pipe chocolate bead or warm plate seal |
Conclusion
Wrap up your learning with a small test batch and clear serving notes.
Start simple. Try a favorite mold, quality chocolate such as Lindt or Callebaut, and a basic mix of 2/3 cup sugar, 1/3 cup cocoa, and a pinch of salt. Use 14–16 oz of hot milk per sphere for a balanced cup.
Temper gently, polish molds, and build strong, even rims so shells release cleanly and seal without fuss. Begin with silicone for ease, then step up to 3‑part or polycarbonate when you want speed or sharper edges.
Celebrate the ritual of watching a single hot chocolate bomb bloom in a mug. Package with clear tags and experiment until you make bombs that look polished, melt beautifully, and taste like a hug in a mug.
FAQ
What size sphere fits most standard mugs?
Choose spheres about 2.5 to 3 inches in diameter for a snug fit. That size melts well when you pour warm milk and gives a balanced cocoa-to-milk ratio without overflowing the cup.
How much cocoa mix and mini marshmallows go inside each sphere?
Use 1 to 2 tablespoons of cocoa mix plus a tablespoon of mini marshmallows per sphere. For richer drinks, add a bit more mix; for lighter, use less. Keep space so the halves still seal cleanly.
Which chocolate type gives the best snap and shine?
Real couverture or high-quality chocolate with cocoa butter offers the best shine and snap when properly tempered. Compound candy melts are easier to work with but won’t match the texture or flavor of couverture.
Can I use white chocolate in warm kitchens without seizing?
Yes — keep white chocolate at room temperature and melt gently using a double boiler or low-power microwave. Stir often and avoid overheating; if it thickens, add a tiny bit of cocoa butter or neutral oil to smooth it.
What’s the simplest way to melt and temper chocolate at home?
Microwave in short bursts (15–20 seconds), stirring between each cycle until smooth. Aim for target temper temperatures for your chocolate type, then cool slightly before molding to ensure stable set and shine.
How do I seal two halves so they stay together when heated?
Warm a flat plate or spoon and press a rim of one half until it slightly melts. Quickly join the halves and hold until set. Alternatively, pipe a thin bead of melted chocolate around the edge before pressing together.
Are silicone molds or polycarbonate molds better for beginners?
Silicone molds are forgiving and easy for first-timers; they release spheres without chipping. Polycarbonate molds give superior shine and crisp edges but require more careful tempering and handling.
How long can assembled spheres be stored at room temperature?
Store in a cool, dry place away from heat and direct light for up to two weeks. Wrap in foil or place in airtight containers to prevent moisture and flavor loss. Avoid refrigeration to prevent condensation.
Is freezing recommended to set molded pieces quickly?
A brief chill (5–10 minutes) can help release shells from the mold, but avoid long freezing sessions. Rapid temperature changes can cause bloom or cracking when the sphere warms up.
How do I avoid bubbles and get smooth walls in acrylic or polycarbonate molds?
Warm the mold slightly, pour chocolate thinly, and tap gently to release trapped air. Scrape excess chocolate cleanly and invert to let the shell set evenly before filling.
What are easy decorating ideas for seasonal gifts?
Drizzle with contrasting melted coating, add sprinkles or crushed candy, and attach small tags with serving instructions. Use flavored mix or peppermint pieces for holiday-themed variations.
How should I package spheres for shipping to prevent breakage?
Cushion each sphere in tissue and bubble wrap, place in a sturdy box with dividers, and include absorbent packets to control humidity. Choose faster shipping to reduce handling time.
Can I color white shells without ruining texture?
Yes—use oil-based coloring or colored cocoa butter for even hues. Powdered color can clump; do not add water-based dyes, which cause seizing and texture changes.
What’s the best milk temperature to pour over a sphere for melting?
Heat milk to 140–160°F (60–71°C). That range melts the shell and fully dissolves the mix without scalding, giving a creamy final beverage and preserving flavor.