
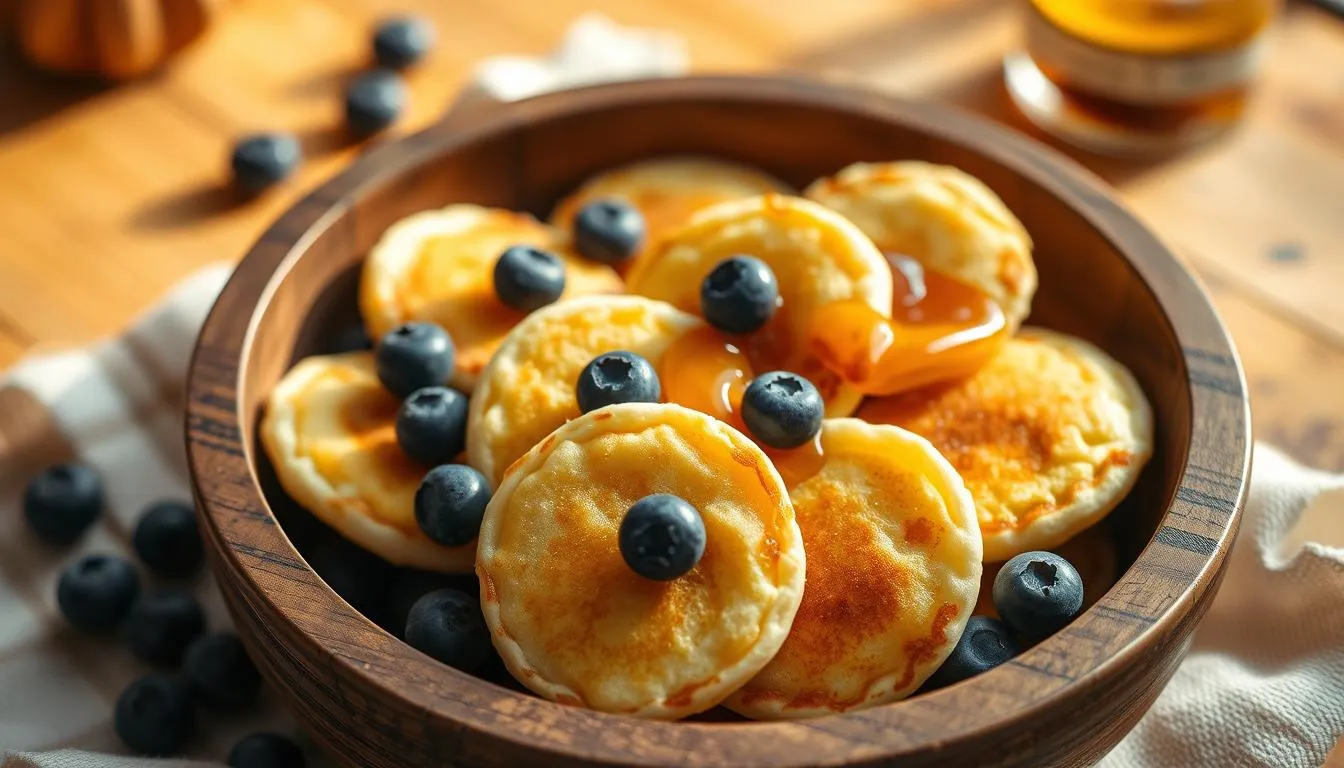
Some mornings feel like they need a little magic. I remember scrolling through a feed and stopping at a bowl so joyful it made me smile. It looked like tiny rounds of comfort, crunchy at the edges and soft inside.
This trend—pancake cereal—turns ordinary batter into coin-size bites that cook fast and feel playful in a bowl. TikTok helped it spread, but the joy is real: a spoonful gives crisp edges and that warm maple hug we love from pancakes.
In this short guide, you’ll find why size matters, what pantry staples like milk, flour, egg, and butter do, and the small tricks that save time and ingredients. We’ll show the simple recipe basics and how to keep batches warm and crisp.
Key Takeaways
- Learn why tiny pancakes deliver a crunchy, spoonable bite.
- Follow a simple recipe using common pantry staples.
- Control heat and batter for consistent coin-size results.
- Keep batches warm at 250°F on a wire rack to stay crisp.
- Find fast make-ahead and reheating tips so breakfasts taste fresh.
Why mini pancake cereal is the internet’s favorite breakfast right now
People loved the look first: uniform, coin-size bites brown quickly and fit neatly on a spoon. That visual hook made the trend shareable and fun to recreate at home.
Smaller size means more crisp edge per bite. Less interior volume gives more golden surface area, so each piece can be crisp outside and tender inside. That contrast is a big part of the appeal.
The method is simple. A smooth pancake batter that pipes clean dots keeps coins from merging in the pan. Preheat high to warm the pan, then lower to medium-low so these tiny rounds cook through without burning.
Eating is playful: use a spoon like cereal, pour a splash of milk, or build tiny syruped stacks. A squeeze bottle or a zip-top bag that dispenses teaspoon-size drops speeds up cooking and makes results consistent.
- Fast batches fit busy mornings and weekend brunches.
- Familiar wet ingredients and simple tools make the recipe easy to repeat.
- The technique adapts to flavors and toppings for creative breakfast recipes.
| Focus | Best approach | Why it works |
|---|---|---|
| Heat | Preheat high, cook medium-low | Even surface heat and controlled browning prevent scorch |
| Piping method | Squeeze bottle or zip-top | Produces uniform teaspoon-size dots that cook evenly |
| Eating style | Spoon with milk or syrup in a small bowl | Offers either a cereal-like bite or classic syrup-dipped treats |
Ingredients for success: pantry staples and smart swaps
Good results begin with simple, dependable ingredients and small adjustments you can make from your pantry.
Core batter basics start with all-purpose flour for structure, baking powder for lift, a pinch of sugar for color, and salt to sharpen flavor.
Wet ingredients include whole milk, an egg, and melted butter for tenderness and richness. Whole milk gives the most classic flavor and color, while plant-based milks like almond, soy, oat, or coconut work if you prefer them.
Milk, oil, and quick swaps
Choose a neutral oil—canola, vegetable, grapeseed, or peanut—to keep flavors clean. Coconut or olive oil adds a mild flavor if you want it.
If you’re out of buttermilk, make a quick substitute: stir 1.5 teaspoons vinegar or lemon into a scant 1/2 cup milk and let it rest a few minutes.
Diet-friendly tweaks
For gluten-free needs, swap a 1:1 blend such as Bob’s Red Mill or King Arthur Gluten-Free; the same mixing and cooking method applies.
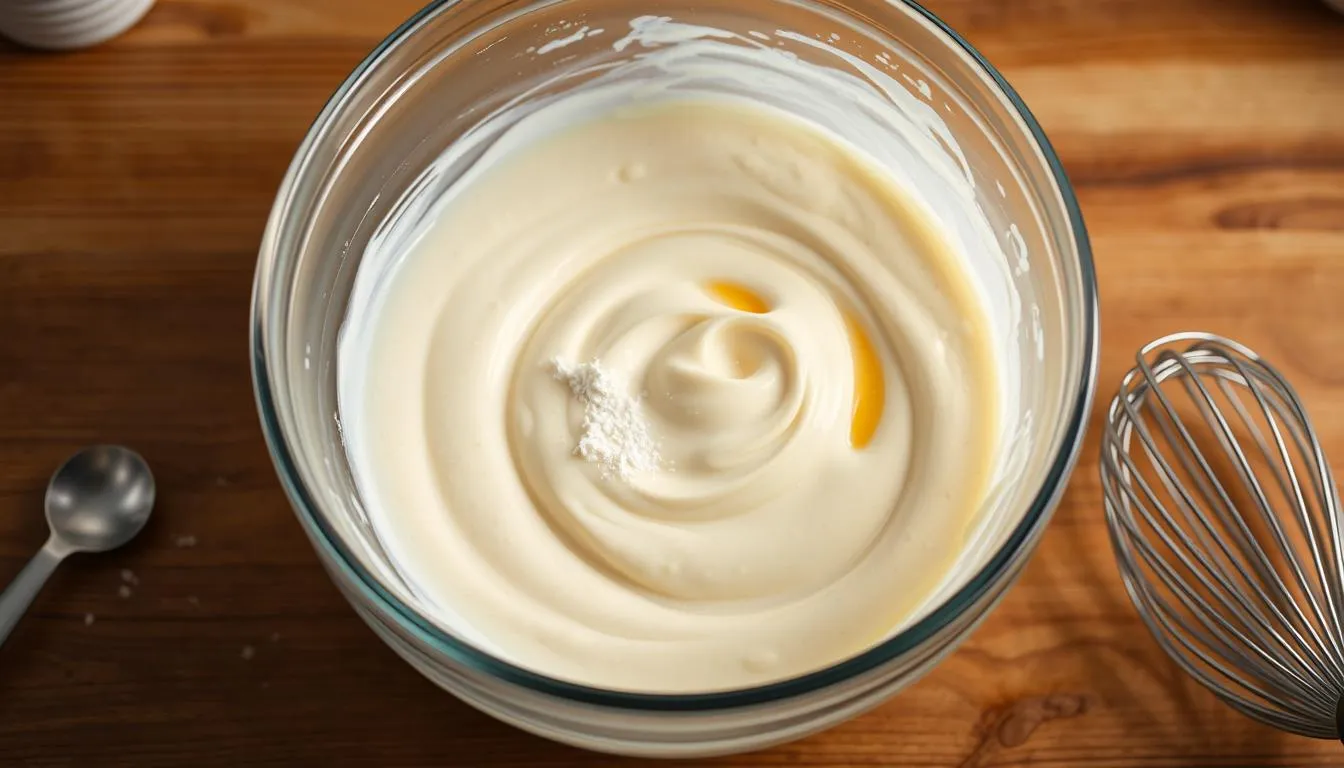
“Keep the batter slightly thick but pipeable; thin with a splash of milk or let it rest to hydrate the flour.”
- Measure a teaspoon or two of sugar—toppings supply extra sweetness later.
- Use kosher salt; if using table salt, use about half the amount to avoid oversalting.
- Mix wet and dry just until combined, then pour pancake batter into a squeeze bottle or bag for even dots on the pan.
A light drizzle of maple syrup on the finished bowl ties the buttery, vanilla-scented minis together without extra sugar in the batter.
Tools that make mini pancakes easy (and perfectly tiny)
Set up a smart station and the work of making small, even rounds becomes fast and fun.
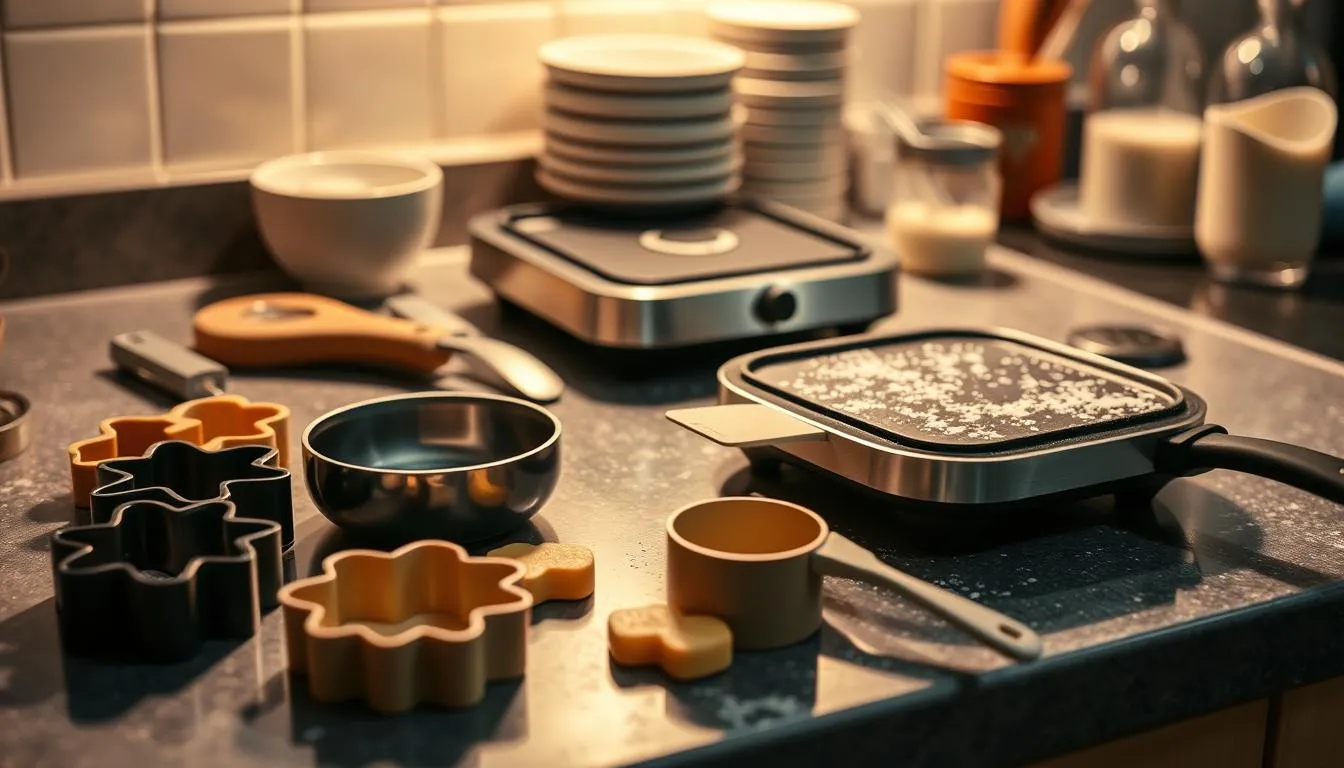
Piping bag, zip-top bag, or squeeze bottle
For clean, consistent dots, a piping bag with a small tip is ideal. A disposable zip-top bag with a tiny snipped corner works in a pinch.
Squeeze bottles give control if you want steady pressure. If you use a bag, start with a very small opening and snip larger if needed.
Nonstick skillet, spatulas, and chopsticks
Choose a true nonstick pan so coins release easily. An electric crepe maker can help by keeping even heat across the surface.
Keep two stiff spatulas nearby to lift and flip without tearing. Chopsticks are great for quick, precise turns at hot spots on the pan.
Oven, sheet pan, and wire rack
Hold finished pieces on a wire rack set over a sheet pan in a 250°F oven. This keeps them warm and crisp while you finish the batch.
Lightly brush the pan with a thin film of neutral oil before piping. Preheat well so the batter sets on contact and coins stay round.
- Keep your piping bag or bottle upright and steady for even sizes.
- Have a small bowl and paper towel to wipe tips clean and avoid smears.
- Organize tools within arm’s reach—seconds matter during cooking.
Step-by-step recipe: from batter to bowl
This hands-on recipe breaks the work into small steps so each coin cooks evenly and stays crisp.
Mix wet then fold in dry
Whisk milk, egg, neutral oil, and melted butter until smooth. Sprinkle in flour, sugar, baking powder, and salt and mix just until combined; small lumps are fine.
Manage heat and prepare the pan
Preheat the pan high to even out temperature, then lower to medium-low. Brush a thin sheen of oil so those tiny edges brown without burning.
Pipe, cook, and hold
Load a piping bag, squeeze bottle, or zip-top bag and pipe dime-to-nickel size dots (about 3/4–22 mm). Space them so coins don’t merge.
Cook about 1–2 minutes until edges set and centers turn lightly golden, then flip with a small spatula or chopsticks and cook the other side 1–2 minutes.
Transfer finished pieces to a wire rack over a sheet pan in a 250°F oven to keep surfaces crisp while you finish the batter.
“Taste a test batch to dial in heat and timing, then proceed confidently through the remaining batter.”
- Tip: If batter gushes, hold the bag parallel to the pan for a thinner stream.
- Measure dots by a teaspoon if you prefer not to pipe.
Pro tips to nail texture, size, and speed
Mastering a few simple settings makes the work faster and the results more reliable. Small adjustments to batter, heat, and flip technique help you hit the ideal texture every time.
Control thickness and piping for consistent coins
A pipeable but not runny batter is key. If the mix gushes, chill it briefly or use a smaller opening so each coin forms cleanly.
Thin a too-thick mix with a teaspoon of milk at a time, or let the batter rest so flour hydrates for smoother piping.
Crispy vs fluffy: heat, oil, and diameter
Preheat high, then cook on medium-low so centers set before surfaces darken. Use oil in the pan for higher heat tolerance; save butter for serving to add flavor without burning.
Smaller pancakes crisp more because they expose more surface area. For fluffier bites, pipe slightly larger coins and lower the heat a touch to cook through in a few extra minutes.
Batch strategy and flipping tips
Avoid overcrowding—about 10–15 per round works well. Keep a steady pace so you flip coins on time for even color on each side.
Flip with two small spatulas to lift from both edges, or use chopsticks to turn singles without smearing batter. A gentle toss can speed things up, but only after most pieces are set.
“Taste and tweak: small heat changes and a quick test batch will tell you when to slow down or speed up.”
| Goal | Action | Why it works | Result |
|---|---|---|---|
| Consistent coins | Chill batter; small piping hole | Reduces gush and spreads on contact | Uniform size and cook time |
| Crisp edges | Smaller diameter; oil in pan | More surface browns evenly at higher heat | Crunchy outside, tender center |
| Even flipping | 10–15 per batch; two spatulas or chopsticks | Prevents crowding and uneven color | Consistent browning both sides |
| Speed without sacrifice | Preheat high, cook medium-low | Fast set then controlled browning | Efficient batches in fewer minutes |
Mini pancake cereal make-ahead, storage, and reheating
A little prep the night before makes mornings much faster and more fun.
Make the pancake batter up to 24 hours ahead. Chilled batter pipes neater dots and holds shape on the pan. Transfer rested batter into a squeeze bottle for tidy piping the next day and give it a gentle stir before use.
As you cook, place finished pieces on a wire rack over a sheet pan in a 250°F oven so steam escapes and they stay crisp while you finish the batch. This keeps pancakes fresh during cooking and saves time when serving a bowl.
Cool extras completely, then seal in an airtight bag and freeze up to 3 months. Thaw overnight in the fridge to avoid soggy pieces. Make sure to press out excess air before sealing to reduce freezer burn.
Reheat in a dry nonstick pan over medium for a few minutes or in a 350°F oven until edges perk up. Avoid the microwave if you want to keep crispness. For busy mornings, cook a double batch and freeze single-portion bowls for quick reheats.
| Action | Method | Result |
|---|---|---|
| Make-ahead batter | Refrigerate up to 24 hours | Cleaner piping; sharper edges |
| Hold while cooking | Wire rack over sheet pan at 250°F | Stays warm and crisp |
| Long-term storage | Freeze in airtight bag (label date) | Keeps up to 3 months |
| Reheat | Pan over medium or 350°F oven | Restores crisp edges in minutes |
Serving ideas and fun flavor spins
Serve a bowl to match your mood. Use a spoon with milk for a playful breakfast that mirrors a childhood cereal ritual. Or use a fork to build tiny syruped stacks that taste like a bite-sized brunch.
Keep toppings simple or go wild. A pat of butter and a drizzle of maple syrup is classic. For dessert-style bowls, add chocolate chips, crushed cookies, or sprinkles. Fruit and cream make a fresher choice—try macerated strawberries with whipped cream for a strawberry shortcake twist.
Spoon or fork, syrup or milk: how to eat your way
A spoon plus milk creates a bowl-and-spoon ritual. Add a teaspoon of warm maple syrup to the milk first for gentle sweetness. A fork lets you stack a few at a time, add butter, then drizzle syrup for tiny, syrupy bites.
Toppings and mix-ins: quick ideas
- Keep it classic: butter + maple syrup.
- Sweet riffs: cinnamon sugar toss, mini chocolate chips, or a cookies-and-cream mix with crushed Oreos.
- Fruit and texture: sliced bananas, toasted nuts, or macerated berries with whipped cream.
- Playful treats: sprinkles, marshmallows, or a dusting of powdered sugar.
“Use oil for cooking and save butter for finishing so your bowl looks golden and tastes rich without smoky notes.”
| Serving Style | What to add | Result |
|---|---|---|
| Bowl with milk | Milk + teaspoon of maple syrup | Comforting, spoonable breakfast with gentle sweetness |
| Mini stacks | Butter + maple syrup, fork | Rich, syrupy bites that mimic full-size pancakes |
| Fruit-forward | Macerated strawberries + whipped cream | Strawberry shortcake feel, light and fresh |
| Snack or dessert | Chocolate chips, crushed cookies, or sprinkles | Playful, dessert-leaning bowls for parties or treats |
For more recipe inspiration and a step-by-step recipe, try a tested version that walks through batter, piping, and serving ideas.
Conclusion
When you control heat and timing, small rounds cook fast and deliver big flavor in every spoonful.
Mini pancake cereal combines a simple method with a big payoff: fast-cooking coins that get crisp edges and tender centers. Make batter ahead to save time and pipe neat dots when you’re ready to cook.
Keep finished pieces warm on a wire rack at 250°F while you finish the batch. Reheat extras in a dry skillet or a 350°F oven to restore that fresh-off-the-pan texture.
Serve with a pat of butter and a drizzle of maple syrup or a splash of milk. With this recipe and a brief setup, you can make pancake bowls any morning and riff on flavors to match the day.
FAQ
What exactly is mini pancake cereal and how is it served?
Mini pancake cereal is made by cooking tiny, coin-sized pancakes and serving them like breakfast cereal — in a bowl with syrup, milk, or both. People also top them with butter, berries, whipped cream, chocolate chips, or cinnamon sugar for different textures and flavors.
What basic ingredients do I need to make a batter that stacks up?
You’ll need all-purpose flour, baking powder, a pinch of salt, a bit of sugar, one egg, and milk. Melted butter or neutral oil adds richness and keeps the batter smooth. For easier piping, keep the batter slightly runny but not watery.
Can I use non-dairy milk or oil instead of dairy?
Yes. Swap whole milk for almond, oat, or soy milk in a 1:1 ratio. Use canola or a neutral vegetable oil instead of butter to maintain a tender crumb. For extra flavor, try light olive oil or melted coconut oil.
How do I get consistent tiny rounds without a mess?
Use a piping bag, a zip-top bag with the corner snipped, or a squeeze bottle to pipe dime- to nickel-sized dots. Keep the pan at medium-low once preheated, and leave small gaps so you can flip easily with a mini spatula or chopsticks.
What’s the ideal pan temperature and cooking time?
Preheat the skillet until it’s hot, then reduce to medium-low before piping. Cook the small rounds about 1–2 minutes per side; watch for tiny bubbles and set edges as your cue to flip. Adjust the heat if they brown too fast.
How do I make them fluffy rather than flat and dense?
Don’t overmix — stir until just combined so you retain air. Use fresh baking powder and a batter that’s slightly thick but still pourable. Cooking on moderate heat helps them puff without burning.
Can I prepare the batter or finished rounds ahead of time?
Yes. Chill batter up to 24 hours; it firms up and pipes neater. Cooked rounds freeze well for up to three months — flash-freeze on a sheet pan then store in a sealed bag. Reheat in a skillet or 350°F oven to restore crisp edges.
What’s the best way to reheat cooked rounds without losing texture?
Reheat briefly in a nonstick skillet over medium or on a baking sheet at 350°F for 5–8 minutes. Avoid microwaving for long stretches, which makes them soggy. A quick toss in a dry pan revives crispness.
Any tips for making them kid-friendly or allergy-friendly?
For kids, add cocoa powder, cinnamon sugar, or rainbow sprinkles to the batter or topping. For allergies, use a gluten-free flour blend and plant-based milk and oil. If egg is an issue, replace the egg with a flax egg or mashed banana and expect a slightly different texture.
How do I decide between using butter or oil in the pan?
Butter adds a nutty, rich flavor and browns nicely; oil gives more even heat and less chance of burning. A hybrid approach — a teaspoon of butter swirled into a tablespoon of oil — offers flavor and heat tolerance.
Can I flavor the batter or add mix-ins?
Absolutely. Vanilla extract, cinnamon, citrus zest, or cocoa powder mix in easily. Fold small mix-ins like chocolate chips or finely chopped nuts into the batter sparingly so piped dots hold their shape.
How should I serve them — with syrup, milk, or both?
Serve however you like: pour warm maple syrup over them for a dessert feel, add cold milk for a true bowl experience, or combine both — drizzle syrup and add a splash of milk for contrast. Spoon or fork works; chopsticks are fun for dipping.
Any pro tips to speed up batches for a crowd?
Use multiple skillets or a large griddle to cook more at once. Keep finished rounds warm on a sheet pan in a 250°F oven. Use two turners or chopsticks to flip quickly, and don’t overcrowd the surface to maintain even cooking.
How do I prevent the rounds from sticking to the pan?
Use a well-seasoned nonstick skillet or a light coat of oil. Preheat properly and drop a test dot first; adjust heat as needed. If using butter, add it just before piping to prevent burning.